How to translate WordPress website content automatically?
There are two ways to completely translate the content of your website, these are the Machine translation and the Human translation, you can use only one of them, using a plugin for Machine translation, for example, or hire a freelancer for the Human translation.
Linguise offers you the option to use only a powerful neural Machine-based translation or also combine it with Human translation for more accurate results.
Why translate a WordPress website?
Almost all the time, the main idea of having a website is to serve it to as many users as possible around the world but as always, there is a main issue, in this case, one of them is the language of your site.
The hard part of this task is how expensive and time consuming it could be as a professional translator should be paid per word and it could take a lot of time to have it translated only to one language so what about if I tell you that there is an automatic and cheaper way to do it? :)
The answer is Linguise, with his powerful Neural translation system, you are going to be able to translate your entire WordPress website content by doing a few steps and with a lot of really good features.
In this post, you’re going to learn how to use Linguise.
Difference between Human and Linguise translation
There are many differences between Linguise and Human translations but let’s talk about two differences, Price and Time.
We are going to make this comparison based on 100 pages with 1000 words.
- In the first scenario, we have the option to pay a low-quality translation for our site which, giving a rate, could cost 0.08$ per word and it could take several days to be translated and the final rate is going to be, based on the number of words we defined before, 8000$ for a low-quality translation.
- In the second scenario, we have the option to pay a high-quality translation, the rate for this is 0.12$ per word so using the same amount of words, the price should be 12000$ for a high-quality translation, and you can also keep in mind that it could take several days, maybe more than the low-quality translation.
- And, in the third scenario, we have Linguise which will translate all these pages instantly, yes, INSTANTLY, but maybe you could think that is not the best quality and, if it is, could be a really expensive service but the answer is no, the translation is a really high-quality translation, and the price is only 165$ per year.
And that’s not all from Linguise, you will also have a frontend tool that will allow you to use a professional translator to review the 10% of your content to have a higher quality translation on your site, this should cost 800$-1200$.
Here are all the plans available for Linguise so you can compare :)

As you can see Linguise will help you to save money and time so what else can you ask for?
Installing and Setting the Translation WordPress Plugin
Now let’s start with the process, and you are going to see how easy it is.
First of all, go to the linguine site and register a new account so you can access your Dashboard to be able to connect to your site.
Now, go to the WordPress integration page and download the plugin.
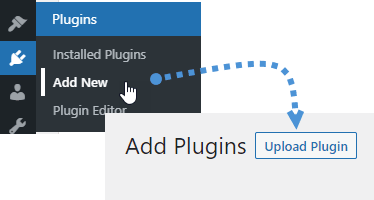
It will download a .zip file, to install it, go to your WordPress site > Plugins > Add New you will see a button to Upload a Plugin where you can select the .zip file and install it.
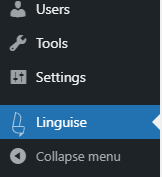
Now that you have installed the plugin, go to the Linguise option in the left menu.
On this Dashboard, you are going to be able to see all the options available for Linguise.
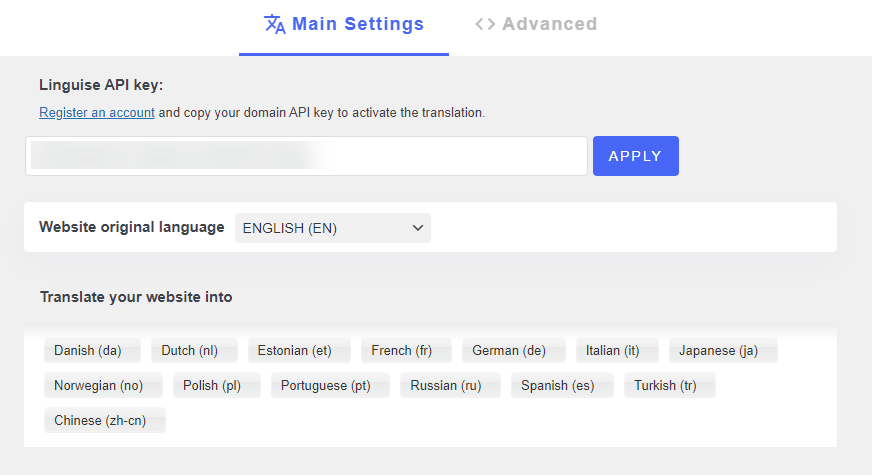
In this section, you have multiple options like the bar to add your API Key, set the original language, and the languages that you want to use for your site.
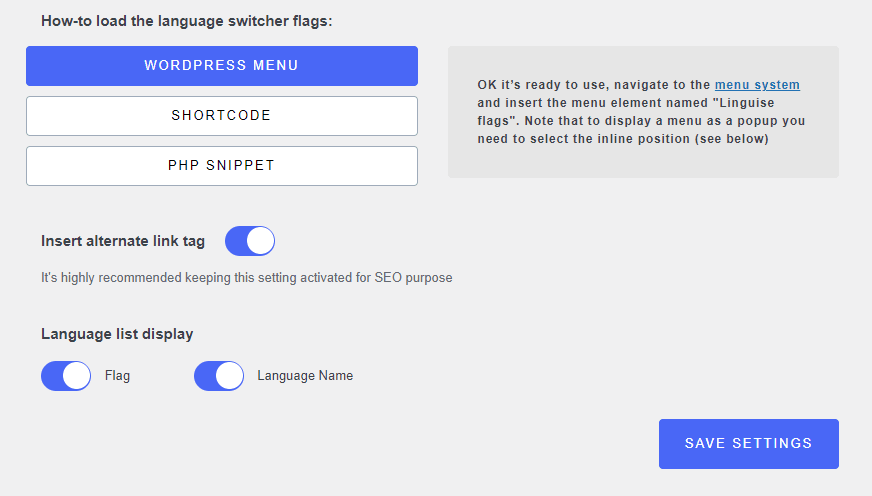
And, in the second view, you have the options to show the available languages, for example how is going to be added, it can be a shortcode, a PHP Snippet, and add it directly to your WordPress Menu.
And, finally, you have the option to insert alternate link tags, and how you want to show your language options, if you want to add only the flags, the language name, or both.
Finally, in the Advanced tab, you have the option to add a text before or/and after the language options, so you can add notes as you can see on this example:
Now that you have set everything on your site for Linguise, you can add the menu how you want, for example, using a menu item, and that’s all, your site is going to be translated, in a few minutes, really easy, isn’t it? :)
Manage all your multilingual sites from the same dashboard
We could think that this was all and that it is already an awesome tool but no, there are other things that we haven’t mentioned yet but we will try to mention all in this post.
Linguine offers you a special Dashboard on his site where you can manage all your sites and the options available for all the sites so you don’t have to go to each admin to change the Linguise configurations.
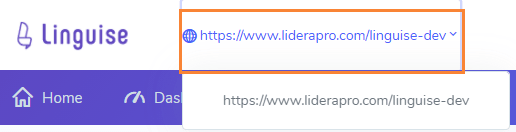
To be able to see it, go to the Linguise site and click on the My Dashboard button.

This will send you to the menu to log in, and then, to the Linguise Dashboard where you can select the domain of the site that you want to set up.
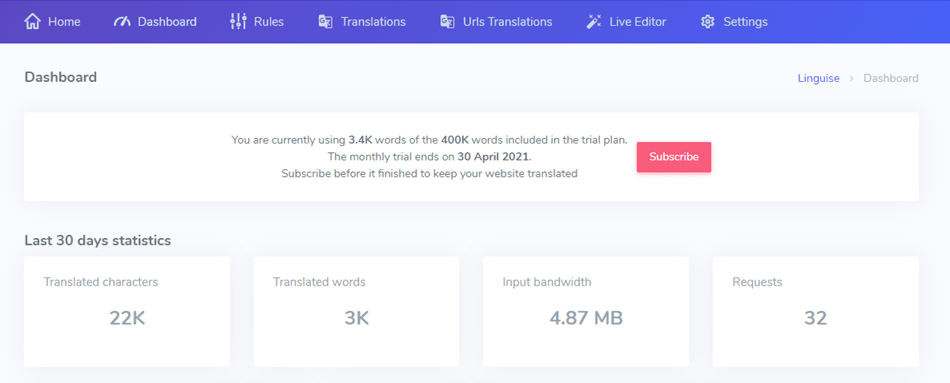
On this main dashboard, you can check a tab with valuable information of the site that you have selected like the words translated, the bandwidth used, the views for your translated pages, and also a filter for views per language of the page.
Automatically improve your multilingual SEO
Now another important part of this translation, which is the SEO, we are happy to know that Linguise will also do all this for you.
When Linguise is installed, the translated metadata is also generated so you won’t have to go to each translated page and translate each item manually, everything is automatic.
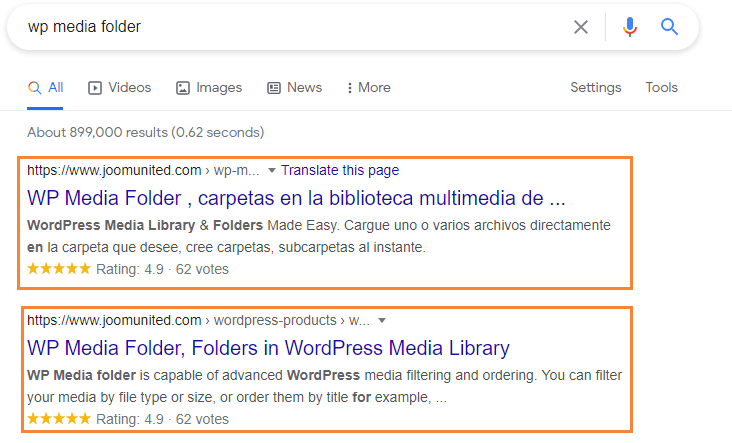
This is not all, as Linguise will automatically generate a page for each language, a translated URL will also be generated so each translated page will be indexed, and you are going to be able to reach a bigger audience in different parts of the world.
Edit your translations in the frontend
With the Live Editor available in your Linguise Dashboard, you are going to be able to edit your translation directly in the frontend by clicking on them.
In order to use it, go to your dashboard and click on Live Editor, and then click on Open Live Editor.

Then select the language for the translation that you want to edit, this will load your site frontend like always but with a switch widget at the top right corner with the option to select between Navigation and Edition.
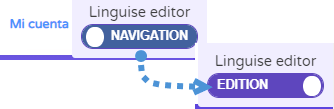
After changing it to Edition, you only have to click on the text that you want to edit, this will open a pop-up with the option to edit and save the text.
This is going to make really easier the process of reviewing your site translations.
General translation tools
If you think that these were all the tools from Linguise, I’m afraid that you’re wrong as there are other options that you can use directly on the Linguise Dashboard, these options are:
- Rules: In this section, you can add rules to your translations, these rules are text ignore, text replace, content exclusion, and URL translation exclusion.
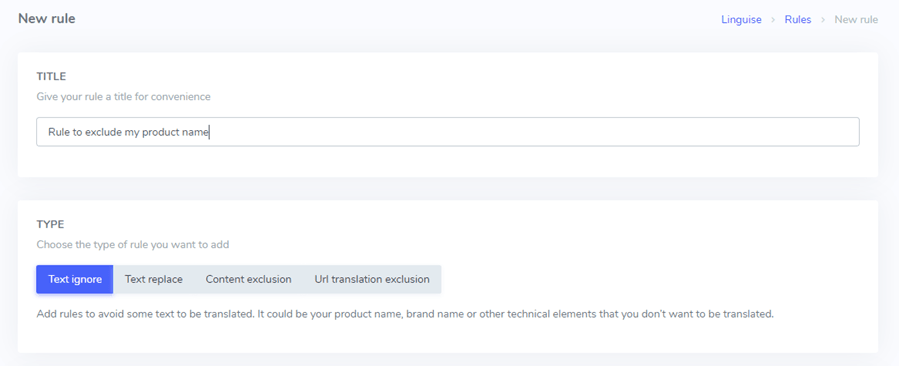
There are also many selectors like URL, HTML Element, and Languages so you are going to be sure that the rules are going to be applied to only the text that you want.
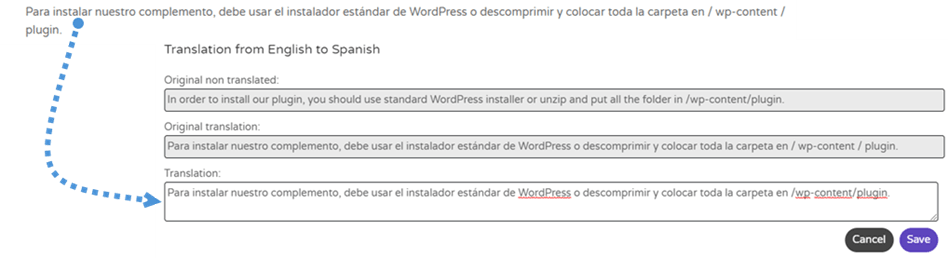
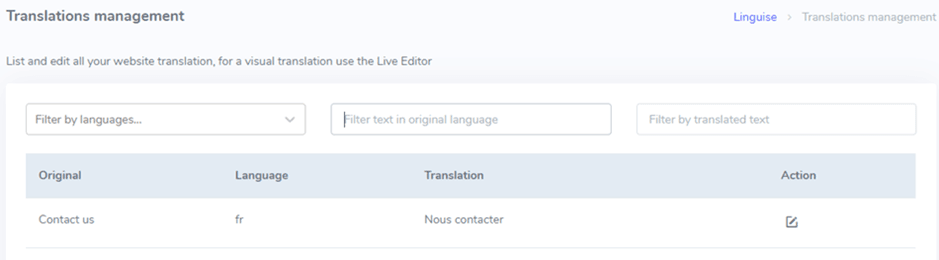
- Translations: In this section, you can edit the translations as you do in the live translator but from the backend, so let’s say that you know that there is a translation that you want to edit but you don’t remember where is it on your site, in this case, this is your tool :)
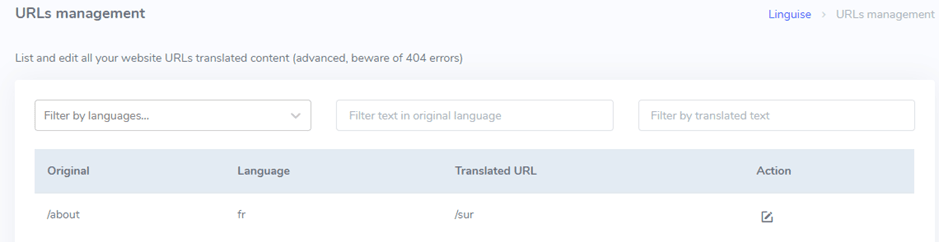
- URLs Translations: This tab will allow you to edit the translation of the URLs so, as you can see, you have control over the URLs’ translation too.
The best website translation performance
Now you could be thinking if all this content is real content and if it is real, it could be consuming your server storage space but don’t worry as it is already covered.
The good news is that all this generated content won’t remain on your server as it is stored in a Linguise server that uses a powerful cache tool that is going to be regenerated per page only when you update a translation so your content is going to be served really fast.
Start using Linguise to automatically translate your website
A perfect translation with perfect tools, the best way to describe Linguise as it offers multilingual pages instantly and for a good price, we also have to say that there are tools that we didn’t mention in this post like the option to invite translators to your Linguise Dashboard :)
Here in imageRecycle, for example, we used Linguise and got our site translated into 20 more languages instantly, and now, we are able to serve our pages to more persons around the world in their own language.
Making your site multilingual hasn’t been this easy before, you can visit the linguise site and check all their available tools and integrations.
- No comments found